
Two-Layer Mini Spring Cupcakes
by Cyndy from The Creativity Exchange
http://www.thecreativityexchange.com/author/cyndy
by Cyndy from The Creativity Exchange
http://www.thecreativityexchange.com/author/cyndy
Directions
1) You can use any of your regular cake or cupcake recipes but you'll have to spray the mini cupcake/muffin pans with a cooking spray to keep the cupcakes from sticking. I used Wilton Cake “Bake Easy” spray made for non-stick cake baking.
2) I found that it worked best to fill the wells of my pans just shy of 2/3rds full.
3) I tested temperatures with my oven and 325 degrees for 16 minutes was absolutely perfect.
4) After the cupcakes have cooled 15 minutes, pop them out onto a wire rack and let cool for at least 45 minutes to an hour.
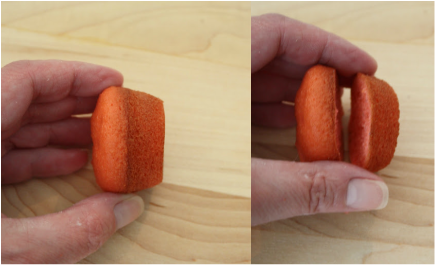
5) With the sharpest and smallest non serrated, slowly slice your cupcakes in half right at the line for the muffin top (shown in picture above)
1) You can use any of your regular cake or cupcake recipes but you'll have to spray the mini cupcake/muffin pans with a cooking spray to keep the cupcakes from sticking. I used Wilton Cake “Bake Easy” spray made for non-stick cake baking.
2) I found that it worked best to fill the wells of my pans just shy of 2/3rds full.
3) I tested temperatures with my oven and 325 degrees for 16 minutes was absolutely perfect.
4) After the cupcakes have cooled 15 minutes, pop them out onto a wire rack and let cool for at least 45 minutes to an hour.
5) With the sharpest and smallest non serrated, slowly slice your cupcakes in half right at the line for the muffin top (shown in picture above)

6) Pipe your frosting to your desired thickness around the edges and center of the bottom layer. You can use a ziploc bag cut to pipe if you do not have a frosting bag.

7) Take your top layer and push and twist. Keep gently twisting while holding top and bottom layers to get that full layer look.
8) I put just a small amount of frosting at the top for decoration.
8) I put just a small amount of frosting at the top for decoration.
